Setting Up VeraPlus Advanced SmartHome Controller

I received this VeraPlus Advanced SmartHome Controller from work, now it is time to set it up.
-Plugin power and Ethernet cables.

-Wait for Power, Internet, and Wi-Fi lights to go green


-Scroll down and check "I agree to the Terms & Conditions" then click Continue.

-Then again Scroll down on the Privacy Policies and check "I acknowledge" then click "Continue"

-Now on this page you only have to check the top option then click "continue"

-On the next page it will ask you to choose your controller, I choose VeraPlus

-Here you choose you device it detected on your network.

-Then click Next Step


-You will receive a email to verify you email address, click the link in the email and if needed log in.
-Once you login it will bring to the Setup Wizard. Click Next here

-On this screen you are going to verify your information then click next.

-This next screen is to validate your email but you should have done that and it should look like this. Just click Next

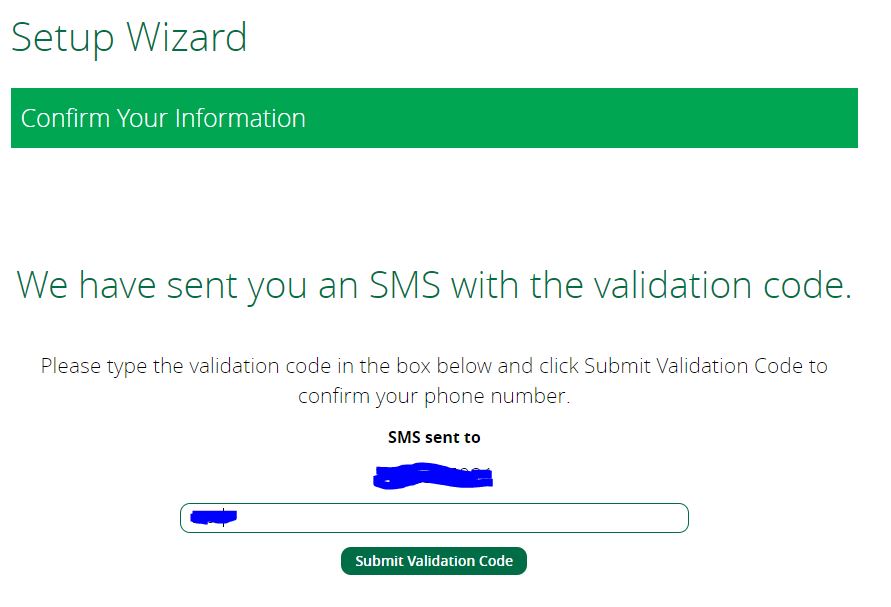
-Now on this step you should have received a SMS/Text message on your cell phone and you are going to enter the 4 digit code they sent. Then click "Submit Validation Code"
-We are now going to enter a unit name then click next

-So next is to setup device to connect to this Advanced Smart Home Controller, however I do not have anything ready for this step so I skipped it for now and will cover this later.

For now that is the end of this setup guide. I have some Light Bulbs and SmartPlug to setup at a later time.
Comments
Post a Comment